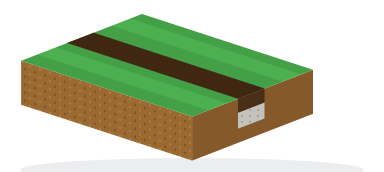
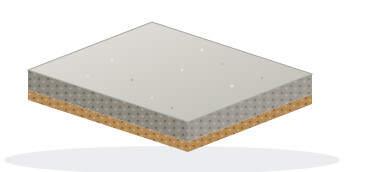
The foundation is the cheapest part of a wall or extension to get right and the most expensive to put right. Most cracks you see in garden walls and extensions trace back to one thing: a footing that wasn't deep enough for the ground it sits in. This guide gives typical UK depths for each job and soil, explains why clay and trees matter so much, and walks through digging and pouring. The trench planner prices the concrete for your trench.

- 450mmminimum depth on firm sand or gravel (frost)
- 0.75–1mon clay, by how much it shrinks
- 2.5m+possible on clay near trees
- 150mmminimum concrete; 225mm is common
1. Why depth matters: frost, clay and trees
A footing has to sit on ground that won't move. Three things move ground in the UK:
- FrostWater in the top 450mm or so freezes, swells and lifts anything resting on it.
- Shrinkable claySwells when wet and shrinks in dry summers, sometimes metres down.
- TreesOn clay, roots drink the ground dry and make it shrink far deeper.
2. Typical depths by soil
These are starting points for walls and single-storey extensions, from Building Regulations guidance (Approved Document A) and NHBC Standards. For an extension, building control confirms the depth on site.
| Job | Typical trench depth | Footing width | Concrete |
|---|---|---|---|
| Garden wall up to 1m, single skin | 450–600mm, to firm ground | ~450mm | 150–225mm |
| Garden wall 1–2m, double skin | 600mm+, to firm ground | ~600mm | 225mm |
| Extension on firm sand or gravel | 450mm minimum (often 1m in practice) | ~600mm | 225mm |
| Extension on shrinkable clay | 0.75–1m minimum | ~600mm | 225mm, or trench fill |
| Clay near trees | From NHBC tables: often 1.5–2.5m | ~600mm | Trench fill; engineer over 2.5m |
3. Know your ground before you dig
- Sand or gravelGritty, drains fast. Good ground: 450mm for frost.
- ClaySticky, rolls into a sausage, cracks when dry. Dig 0.75–1m or more.
- Made groundOld rubble or fill: dig through it to natural ground, or get advice.
- Roots or soft spotsCut roots over 50mm need advice; dig soft pockets out and fill with concrete.
Not sure what you have? Dig a trial hole to the planned depth first, and ask building control or your local authority. On an extension they'll often tell you the depth they'd expect on your street.
4. Width, thickness and trench fill
- Width: wide enough to spread the wall's weight. About 600mm is typical for an extension wall; 450mm suits a single-skin garden wall.
- Thickness: at least 150mm, and at least as thick as the footing sticks out past the wall face. 225mm is the usual choice.
- Trench fill: on clay or deep trenches, many builders fill the trench with concrete to within about 150mm of the ground instead. It uses more concrete but saves laying blocks in a deep, narrow trench, and is often quicker and safer.
- Steps: on a slope, step the footing rather than slope it. Each step overlaps the one below by at least the concrete thickness.
5. Plan and price your trench
Enter your trench and the planner works out the concrete, the bags to mix it on site (or the ready-mix to order) and the spoil to get rid of, priced at the cheapest UK merchant we've found. It uses the same maths as the foundation calculator.
The planner needs JavaScript. You can still use the foundation calculator.
Assumes 10% extra concrete for uneven trench sides, a 1:6 cement and all-in ballast mix (about 2,050kg of dry mix per m³), 850kg bulk bags, ready-mix in 0.25m³ steps with a 1m³ minimum, and spoil bulking up by 30% (about 1.8 tonnes per m³ dug). Ready-mix prices vary too much by area to track.
6. Digging and pouring, step by step
- Tell building control before you start, for an extension. Book the trench inspection for the day you finish digging.
- Set out the trench with pegs and string lines, and mark it with spray paint. Check for drains, pipes and cables first.
- Dig to depth with straight sides and a flat, clean bottom on firm ground. Don't leave it open in rain longer than you must: wet clay softens.
- Get it inspected. The inspector may ask you to go deeper if the ground isn't right. Pour as soon as possible after they approve it.
- Set level pegs in the trench with their tops at the finished concrete level, checked with a laser or long level.
- Pour in one go if you can. Over about 1m³, ready-mix straight from the lorry (or a pump) is far easier than mixing on site.
- Compact and level the concrete to the pegs, working out the air with a shovel or a hired poker.
- Cover and wait. Keep it damp and protected from frost, and give it a few days before building on it.
7. Mistakes that crack walls
- Too shallowFrost or shrinking clay moves it, and the wall cracks.
- On topsoil or fillAlways dig through to firm, natural ground.
- Ignoring treesOn clay, a tree nearby can mean metres deeper.
- Pouring into waterPump the trench out; standing water weakens the concrete.
- Pouring in batches days apartCold joints are weak spots. Pour in one go.
- Skipping the inspectionBuilding control may ask you to dig it up.
8. Foundation checklist
Print this page (the planner is left out of the printout) and tick these off as you go:
- Building control notified (extensions), trench inspection booked
- Soil checked with a trial hole; trees within about 20m noted
- Depth, width and concrete thickness agreed
- Drains, pipes and cables found; skip or grab lorry booked for the spoil
- Trench dug to firm, natural ground with a flat, clean bottom
- Trench inspected and approved
- Level pegs set to the finished concrete level
- Concrete poured in one go, compacted and levelled
- Concrete covered and kept from frost while it hardens
Building a wall on it? See the garden wall guide, or work out the spoil with the excavation calculator and a skip with the skip size calculator.